25 Unreal Engine Tips
01. Importing textures into Unreal 4
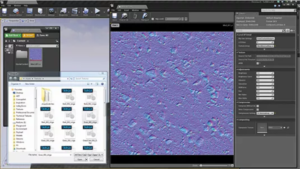
Textures can be imported in a matter of clicks
You can import textures via the Import button in the Content Browser. Unreal 4 supports a large variety of texture formats, from .tgas and .pngs to .psds and .jpgs. One important tip is to make sure normal maps are compressed as TC Normalmap to prevent visual errors in engine. Also be aware that if your texture dimensions do not follow the power of two, they won’t stream or have mipmaps.
02. Save memory: Channel-pack textures0
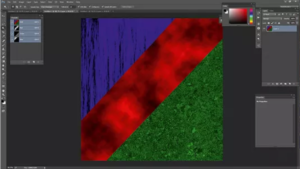
One of the fantastic things about Unreal is the large amount of control you get to have by creating your own materials. When you’re creating multiple black and white masks for textures like roughness or transmission, you are able to save memory by hiding each mask into an individual channel of a texture image and then accessing each channel of that texture separately in your material.
03. Physically-based rendering

With the dawn of new rendering capabilities in new engines like Unreal 4, there has come the widely praised adaptation of physically-based rendering. This should definitely be worked with rather than against. Learning how to accurately represent the physical properties of materials with roughness and metalness masks can seem like a change from the way game engines worked last generation but can help keep materials consistent and believable across multiple lighting environments.
04. Texture reuse
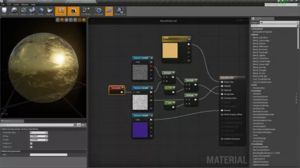 Texture reuse helps to save on memory
Another fantastic element of Unreal 4’s Material Editor is that it allows for very intelligent texture reuse. This can not only save you memory, but also time. Sometimes a red channel from a rock albedo texture can make a great overlay for a roughness texture. A tiling cloud render texture from Photoshop could be useful for adding variation to a brick, but also to blend in a detail texture for some concrete. The possibilities are endless.
05. Don’t make unnecessary textures
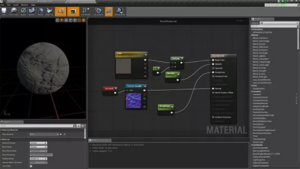
Cutting down on textures can also spare your memory
Occasionally certain textures are not needed and can be left out to save memory. For 100 per cent non-metal materials like wood or dirt, a metalness texture can be substituted in the Material Editor for a simple float constant with a value of 0. The same idea can be applied for multiple versions of the same material. Three slightly different colored bricks don’t all need different normal maps, but could share one.
06. Building a core material set
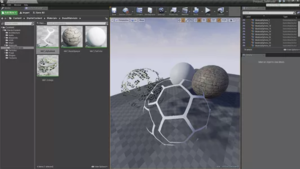
Large collections of materials can be made by instancing a smaller set of base materials
One way to save considerable time and work is by creating a basic set of materials that can be instanced out for different objects. When I start projects I create a base material for each type of object I’ll need. For example, if I was making a nature scene I would want base materials for terrain, props and foliage. There will always be outliers but it helps with the bulk of the process.
07. Iterating through material instances
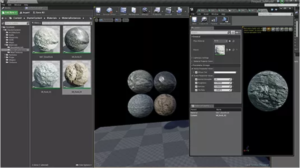
A great feature of a Material Instance of a base material is its ability to parameterize values that can be changed in real time. You can use these changes to rapidly test out many different values without having to recompile a material. Whenever I have a complicated material I always have a test material instance on the side. I use the test material instance to lock in more realistic base values for the final material.
08. Material comments and organisation
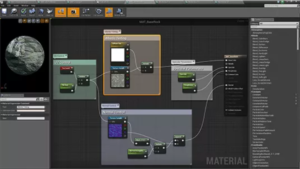
Basic text descriptions can accompany nodes
For very complex materials Unreal 4 brings some very welcome organisational tools to help. Selecting a group of nodes and pressing C puts those nodes into a comment, which can then be moved as a group and color coded. The comments (and individual nodes) can have basic text explanations added to improve readability.
09. Material functions

Material functions can perform repeat actions
Material functions can be thought of in the same way real functions work in code – repeatable operations that can be called multiple times to perform a specific set of instructions. They are made outside of a material in the Content Browser, but can then be called on their own to help simplify materials. They can contain their own set of inputs and can be a fantastic way to save time when repeatable operations need to be called.
10. Foliage materials
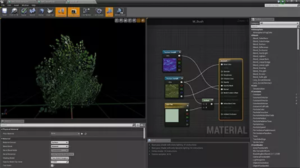
Foliage Shading Models make creating foliage easier
Foliage can be one of the trickiest things to ensure looks correct in any game engine. As of UE4 version 4.7, a Foliage Shading Model exists to help make that task easier. It is highly recommended as it supports sub-surface transmission, which most leaves benefit from. I also recommend adding sky light to your scene to help balance out some of the darker areas of a foliage mesh that could be in shadow.
11. Vertex colours
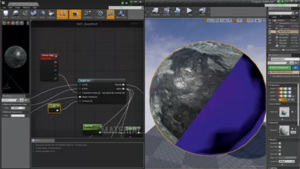
Having access to vertex colors in materials is one of my favorite features in Unreal 4. They can be incredibly powerful when used creatively. From ambient occlusion to masking out wind and world offset for foliage,their versatility is incredible. They’re particularly useful in blending tiling textures together. Vertex colors can be imported from outside 3D software or imported and painted in editor.
12. Detail diffuse and normal overlays
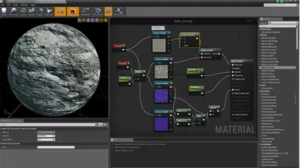
Secondary textures increase the material detail
Because you can customize texture UV tiling rates you can increase the details of a material by blending in a secondary set of textures, usually diffuse or normal maps, then tiling them at a higher frequency on top of base textures. Diffuse detail can be applied with various techniques, such as the Overlay Blend Function, while detailed normal maps can be applied by adding the red and green channels to the base as normal.
13. Texture blending in materials
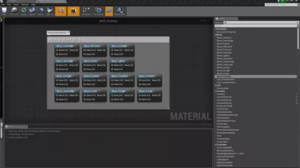
Want to combine textures in the material editor but only familiar with Photoshop’s blend modes? Epic has it covered. Along with many useful material functions, they included the majority of blend modes that all Photoshop users are familiar with. From Overlay to Linear Dodge, they can be found in the Palette window inside the Material Editor. They can be particularly great for adding detail and variation to your materials.
14. Knowing your light types
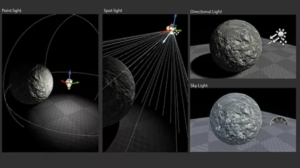
4 different light types can be used
Unreal offers four different types of lights to use in the environment: Directional, Point, Spot, and Sky light. Directional lights are great for outdoor areas or any kind of extreme singular light source. Point lights are omni-directional and Spot lights are similar but have their limits defined by a cone. Sky lights can be used to add ambient light to your environment by capturing distant parts of your map. They also support custom Cubemaps.
15. Adding environment fog to your scene
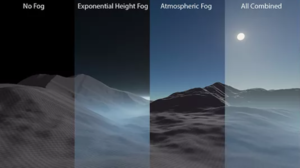
Unreal 4 provides a fog alternative to particle effects
While close up fog can always be created with particle effects, Unreal 4 offers two other ways to add fog to your scene. Atmospheric Fog reacts to directional lighting angles and intensity to create fog based on actual scattering of light in the atmosphere. Exponential Height Fog gives a bit more color control and allows you to add a simpler fog effect that becomes less dense in higher parts of the map and denser in lower parts.
16. Creating clever light shafts

Light Shafts or ‘god rays’ can be a powerful visual tool and are created by particles in the air being lit by specific light sources. In Unreal 4 they can be created in a few ways. The most common way is by enabling them from the properties of a Directional light. They can also be made using geometry and clever materials. Epic’s blueprint example project contains a good example of how someone could go about doing this.
17. Taking high-resolution screenshots

There are easier ways to take high-resolution screenshots
While custom resolution videos can be rendered out of Matinee, there is a quick and easy way to take high-resolution screenshots straight from the editor. By clicking the little downward arrow in the top left of your Viewport you can reveal a little drop down menu. At the bottom of that you can open up the High Resolution Screenshot window. From there high-resolution shots can be captured and sent to your project/saved/Screenshots folder.
18. Color correction and look-up tables
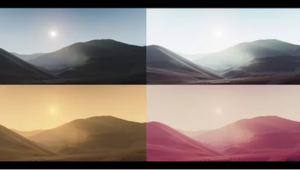
Color look-up tables allow for complex color transformation
Using post-process volumes, final render colors can be tweaked and adjusted based on artistic preference. While options exist for basic settings like contrast and color tinting, custom color correction can be done using color look-up tables. These tables allow for complex color transformation and can be made with a base file available on Epic’s Unreal 4 documentation site and Photoshop – or other image adjusting software suites.
19. Editing bloom and lens flare
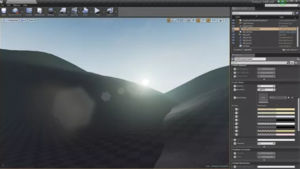
Lens flares can be customized to create your desired effect
Image bloom and lens flares post processing has become popular in games and 3D and can be enabled and customized in UE4 using post-process volumes. Bloom can be highly customized in almost every sense. Size, color, intensity, and threshold can all be tweaked and even be used to mask in dirt textures to mimic dirty lenses. Similarly, image- based lens flares can also be enabled and their shapes and intensity adjusted.
20. Creating depth of field
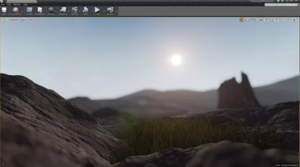
Creating depth of field is a delicate process where foliage is concerned
Unreal 4 supports both Gaussian and custom shaped bokeh depth of field. Both of these options exist within the settings of Post Process Volumes. It should also be noted that while bokeh sprite weighting exists to help with blurring thin objects in front of distant objects and vice versa, problems can sometimes still occur. Care should be taken when applying depth of field to foliage and other similar shots.
21. Auto exposure and eye adaptation
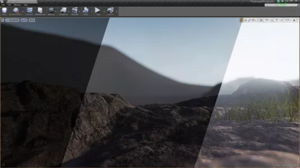
Auto exposure mimics real life eye adjustments
Auto exposure control is on by default and simulates eye adjustment to bright or dark areas. The effect is awesome but can create constantly changing visual variables that are hard to stay consistent within. Adjustments to the exposure range can be made in the settings of post-process volumes and can be disabled by setting the minimum brightness equal to the maximum. Exposure bias can be used to adjust base exposure settings.
22. Light functions

One fun feature when lighting in Unreal 4 is the support of light function materials. These materials act as masks for the light and can be used to make anything from custom color variation in a light to cloud shadows on the ground. They are made by setting the Material Domain to Light Function in the Material Editor and can be used on spot, point, and directional lights.
23. Save yourself time by copying and pasting
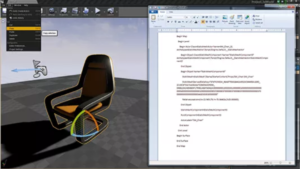
Unreal 4 can copy and paste any object between levels
One fantastic trick to know about Unreal 4 is that any object in a level can be copied and pasted directly into another level within the same project. It will appear with the same properties and in the same location. What’s even better is that anything copied from Unreal can be pasted into a text document. That text can then be copied and re-pasted into another Unreal 4 level.
24. View modes and buffer visualizations
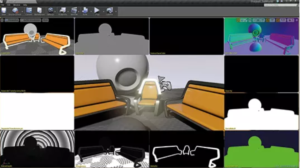
Toggling between view modes can track level wide ranges of material inputs
Knowing what makes up your image is an integral part of working in any 3D engine and working in a deferred renderer like UE4 allows for some useful view modes. Pressing Alt and 1-8 switches between various view modes like Unlit or lighting only but if you click on the View Mode button in the Viewport you can view individual buffers. This can be useful for seeing level wide ranges of material inputs, like roughness.
25. Performance tips

Turning down certain options can speed up workflows
While Unreal is incredibly powerful, not every workstation is created equally. If you are running into performance problems in-engine, the first place to turn is the Engine Scalability Settings within the Setting button on the Editor Toolbar. Turning down some options like anti-aliasing can really speed things up when working. Another trick is to organize large groups of assets into folders in the world outliner. You can then toggle their visibility to help with performance.


